-
 Daniel Ellis
- 28 Feb 2024
The Top 10 Ways You Might Accidentally Take Down Your Team in Helldivers 2
In the adrenaline-fueled chaos of Helldivers 2, the line between heroism and accidental team sabotage can be perilously thin. With friendly fire perpetually enabled, every mission is a dance with danger, not just from the alien threats lurking around every corner but from the very allies you fight alongside. The game's relentless pace and the high stakes of its cooperative play demand precision, awareness, and above all, communication. Yet, even the most seasoned squads can find themselves in unintended predicaments that turn a well-oiled operation into a comedy of errors—or a tragedy of miscalculations. Here, we explore the ten easiest ways your intentions to protect Super Earth can inadvertently lead to your team's downfall, and how you might avoid these pitfalls.
1. Misplaced Shots in the Heat of Battle

In the thick of an intense firefight, it’s all too easy for focus to narrow on the encroaching enemy, leading to a critical oversight: your moving teammates. A momentary lapse in spatial awareness or a sudden, unexpected movement can result in a devastating shot to an ally. The solution lies in constant communication and developing an acute sense of your teammates' positions, even as you keep your sights on the enemy.
2. The Unpredictable Bounce of Grenades
Grenades, with their deadly efficiency and satisfying destructive capability, can turn into a game of dangerous unpredictability as they ricochet off terrain and obstacles. This unpredictability can send them spiraling back towards your team or detonating in an unintended location. Grenade users should practice and get a feel for how these explosives behave in different environments, minimizing the risk of a misfire.
3. The Hidden Dangers of Minefields
Strategically placed minefields can be a game-changer, decimating enemy ranks with lethal efficiency. However, the thin red line between effective defense and accidental self-sabotage is easily crossed if these mines are forgotten or placed without clear communication. Marking mine-laden areas and keeping constant verbal reminders can save your team from an explosive surprise.
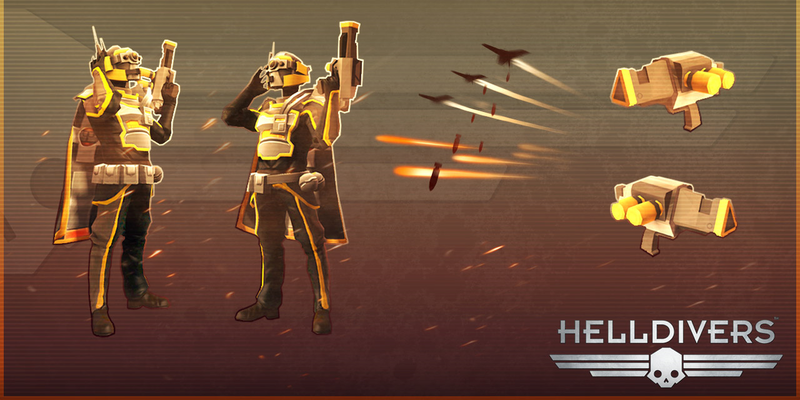
4. Death From Above: Resupply Pods
Calling in a resupply is a moment of hope, a lifeline in the midst of battle. Yet, this beacon of replenishment can quickly turn into a harbinger of doom if a pod's landing zone isn't clearly communicated or if an ally inadvertently wanders into its path. Always announce resupply calls loudly and clearly, and mark the landing zone visibly to all teammates.
5. Mortar Sentry: Friend or Foe?
The Mortar Sentry, with its long-range devastation, doesn't discriminate between friend and foe when it unleashes its barrage. Placing it without considering the movement patterns of your team or the battle's dynamic flow can lead to tragic results. Communication and strategic placement, away from the team's main pathways, are key to harnessing its power without collateral damage.
6. The Eagle 500KG Bomb’s Devastating Precision
With power comes responsibility, and the Eagle 500KG Bomb embodies this maxim. Its massive destructive radius and quick deployment time mean that any misjudgment in its call-in can result in a catastrophic loss for your team. Precise coordination and pre-planning are essential when employing this formidable weapon, ensuring everyone is clear of the target area long before it strikes.
7. The Guard Dog Rover’s Indiscriminate Defense
The Rover's unyielding defensive capabilities, while invaluable, come with the risk of turning its lethal focus on those it's meant to protect. Its 360-degree attack range requires careful positioning and foresight to ensure it supports the team without becoming a threat. Awareness of its orientation and immediate surroundings will prevent unintended casualties.
8. Orbital Gas Strikes: A Cloud of Confusion
The Orbital Gas Strike's ability to seep through cover and decimate anything in its path makes it a double-edged sword. Without clear warnings and strategic placement, this gas can envelop allies as easily as enemies. Effective use requires detailed planning and immediate communication to ensure all team members are aware and can evacuate the affected area swiftly.
9. The Eagle Cluster Bomb’s Unforgiving Blast
The Eagle Cluster Bomb's area of effect and instant call-in demand a high level of situational awareness and team coordination. Its indiscriminate nature means a stray teammate in the vicinity can turn a strategic advantage into a team tragedy. Clear, concise communication and agreed-upon signals for deploying such stratagems are vital for preventing mishaps.
10. Orbital 380MM HE Barrage: A Test of Precision
Perhaps the most challenging to wield without incident, the Orbital 380MM HE Barrage's erratic pattern and extensive blast zone make it a perilous choice. Its effectiveness is undeniable, but so is the risk it poses to your team. Using this power requires a mastery of timing, unparalleled communication, and a deep trust among teammates to ensure its devastating force is directed away from friendly forces.
In the end, the key to avoiding these pitfalls lies in the very foundation of Helldivers 2's design: teamwork. Through constant communication, a deep understanding of each other's play styles, and an unwavering commitment to the mission, squads can minimize the risks of friendly fire. The chaos of battle may be unpredictable, but with a disciplined approach and mutual respect, your team can navigate the dangers of friendly fire, turning potential disasters into moments of triumph. Remember, in the world of Helldivers 2, your greatest strength and your most formidable adversary can often be one and the same: your team. Stay sharp, stay aware, and above all, stay together.

0 Comments
Leave a comment
Your comment is awaiting moderation. We save your draft here